NuttyTart

Mageirocophilia

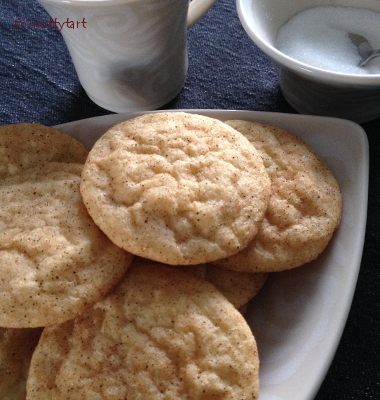
Snickerdoodles (Without Cream of Tartar) (I KNOW)

SnickerdoodlesHello! How are you? I hope you’re well! I took a year off and fiddled with recipes out in the real world, but alas, also got distracted by seven other projects, so Real World Recipe Project is still a WIP. Maybe by 2020!


Anyway, TLSO is dieting again. This time it’s serious business with salad and boiled chicken and absolutely no baked goods. So that’s bad, baking-wise. But, since people do occasionally pop around for coffee and we obviously can’t give them nothing to go with their coffee, I have occasionally baked just a small batch of a little something. Like snickerdoodles without cream of tartar. I KNOW. But I was out so one has to make do. One was allowed to bake, after all.


Apparently the recipe is of Martha Stewartian origin.


Snickerdoodles


115 g unsalted butter, softened

3/4 cup caster sugar

1  egg

1 teaspoon vanilla extract

1 cup  + 6 tablespoons all purpose flour

1 teaspoon baking powder

1/4 teaspoon salt

plus

1 tablespoon sugar

1 teaspoon ground cinnamon


Preheat oven to 175 C (350 F). Line two cookie sheets with parchment paper.

Sift together all-purpose flour, baking powder, and salt; set aside.

Cream butter and sugar with an electric mixer until light and fluffly. Add the egg and the vanilla extract, beating well.

Gradually mix in the flour mixture using a wooden spoon.

In a small bowl, mix 1 tablespoon sugar with 1 teaspoon cinnamon.

Roll rounded teaspoonfuls of the dough into balls (I used a 1-inch cookie scoop without leveling), roll the balls in the sugar-cinnamon mixture, and place onto cookie sheets.

Bake for 9-11 minutes, or until the cookies are just beginning to turn golden around the edges. Let stand on the cookie sheet for a few minutes and set before removing to cool on a wire rack.


Save

Share on FacebookShare on TwitterShare via email

Habanero Jelly

fresh habaneros

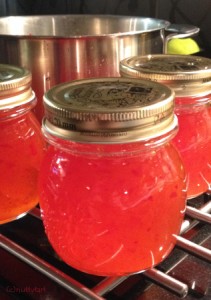
habanero jelly jars


Hello, sweet hotness! Fresh habaneros can be turned into the most beautiful red jelly that goes wonderfully with cream cheese & crackers. Or with goat cheese. Or as a BBQ glaze. Add it to grilling sauces, serve it as a side with chicken. Make it, eat it. It’s hot, it’s good.


Habanero Jelly (makes approximately 750 ml)


2 red bell peppers

3-6 fresh, ripe habanero peppers

3/4 cup white vinegar

3 1/2 cups jam sugar (sugar with pectin)


Remove stems, seeds and membranes from both bell peppers and habaneros. Chop. Wear gloves when handling the habaneros. No, seriously: wear gloves. You won’t want to touch your (or another person’s) eyes, lips, or any mucous membranes for hours and hours after handling habaneros with your bare hands, no matter how carefully you wash them. You really don’t. Don’t ask. Just wear gloves.

Put peppers in a blender, add vinegar. Process until smooth. (Beware the fumes!)

Pour the pepper puree into a non-corrosive saucepan and heat gently.

When steam begins to form, add the jam sugar and stir. Bring to boil, and allow to simmer for 15 minutes (check the time on the jam sugar package, they can vary), stirring occasionally.

Remove from heat. Pour into hot, sterilised jars. Seal.


Share on FacebookShare on TwitterShare via email

Caramel Squares

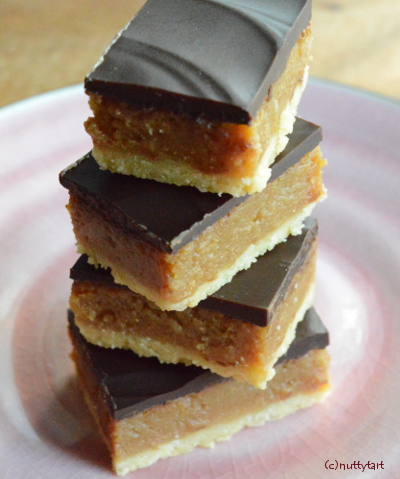
caramel squares

Millionaire’s shortbread. A buttery crust, a thick layer of toffee, dark chocolate. Rich, delicious, decadent. I don’t see how one could need any more incentive to make these.


The recipe was originally posted by the lovely Mille® on recipezaar.com. I have metrified.


Caramel Squares


Shortbread crust:
100 g butter, at room temperature
3 tablespoons sugar
60 g cornstarch, sifted
85 g all-purpose flour, sifted


Caramel filling:
125 g butter
85 g brown sugar
2 tablespoons honey
1 (385 g/14 oz.) can sweetened condensed milk
1 teaspoon vanilla essence


Chocolate topping:
240 g dark chocolate, melted


Preheat oven to 175°C. Line and grease an 18 cm x 28 cm (7″ x 11″) tin.
To make crust: Place butter and sugar in a bowl and beat until light and fluffy.
Sift in the cornstarch and the plain flour; mix. Turn onto a lightly floured surface and knead briefly to make a smooth dough.
Press the dough into the prepared tin and bake for 25 minutes, or until firm.
To make filling: place the butter, brown sugar and honey in a saucepan. Cook over medium heat, stirring constantly, until the sugar melts and the ingredients are well combined. Bring to the boil and simmer for 7 minutes.
Beat in the sweetened condensed milk and the vanilla essence.
Pour the filling over the baked crust and bake for 20 minutes longer.
Allow to cool completely.
Topping: Melt the chocolate over the top of a double boiler, and spread the melted chocolate over the filling. Set aside until firm, then cut into squares.

Store squares at room temperature in an airtight container.


Share on FacebookShare on TwitterShare via email

Gooseberry & Banana Jam

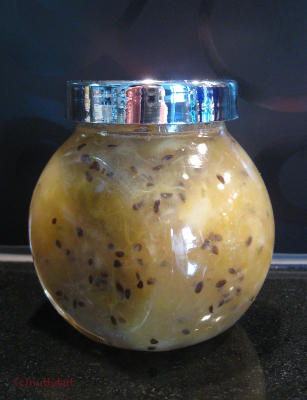
Gooseberry Banana JamIt was a very good gooseberry year. There are probably still a few litres of berries hiding inside the thorny bushes, because we just gave up a few weeks ago: the freezer is full and there’s only so much gooseberry pie two people can eat! This is new recipe I tried out this year: ripe and juicy green gooseberries meet sweet bananas in a jam. Perfectly delightful!


Gooseberry and Banana Jam (makes about 1,5 litres)


700 g gooseberries, topped, tailed and rinsed

2-3 tablespoon water

2 bananas, chopped

500 g sugar with pectin


Put gooseberries and water in a saucepan. Bring gently to boil.

Gradually stir in sugar. Simmer for about five minutes.

Add chopped bananas and continue to simmer for about ten minutes, stirring gently occasionally.

Remove from heat and allow to cool for half an hour, stirring occasionally (and skimming off foam, if needed). When the jam begins to set slightly and the berries no longer rise to the surface, transfer into sterilised jars and seal.


Share on FacebookShare on TwitterShare via email

Rhubarb Curd

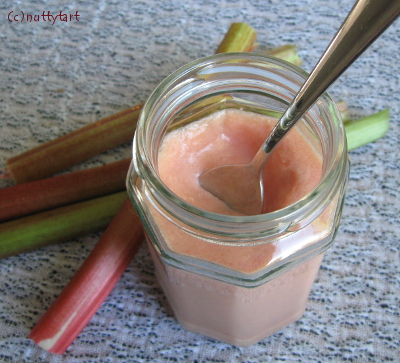
Rhubarb CurdRhubarb curd is divine. There, I’ve started with the main point of the whole post. It’s really, really good, and I’m mortified that I have no gorgeous photos to show you just how beautiful it was in these dainty little individual tartlets I made – buttery crust, rhubarb curd filling, meringue top. Can you imagine them? I hope so, because as luck would have it, I have no pictures. *sigh* Anyway, you do need rhubarb curd in your fridge, on your toast, in your cookies, and on your pies, so make some!


The pale pink colour comes courtesy of food colouring. The organic egg yolks I used were a particularly vibrant orange, and combining them with the pale red rhubarb juice resulted in an orangey yellow curd and not a pink one at all, so I turned to artificial means to get a curd that looks rhubarby. Feel free to skip the colouring – it is the taste that counts, of course! I also used some sugar with pectin to make extra sure the curd would thicken, but plain old granulated white sugar should work just fine: it’s the yolks that do the thickening.


Rhubarb Curd (makes about 300 ml)


250-300 ml unsweetened rhubarb juice

3 egg yolks

75 ml sugar with pectin + 75 ml granulated sugar OR 150 ml granulated sugar

50 g butter, cubed, at room temperature

red food colouring, optional


First, reduce the rhubarb juice to make a more concentrated base. Place rhubarb juice in a saucepan and bring gently to boil. Simmer until the juice has reduced to about 100 ml. Allow to cool.

In a saucepan, whisk together reduced rhubarb juice, egg yolks and sugar(s). Heat the mixture gently over medium heat, whisking, until it comes to boil. Turn the heat down a little, and continue to simmer until the mixture begins to thicken (5-7 minutes).

Pour the mixture into a bowl and place the bowl in a cold water bath. Whisk mixture at low speed until it lightens and becomes a little foam-like. Add butter cubes and whisk until smooth. (Add food colouring if you prefer – I used about ½ teaspoon)

Transfer the cooled curd into a glass jar and refrigerate. Keeps for about two weeks.


Share on FacebookShare on TwitterShare via email

Rhubarb Juice

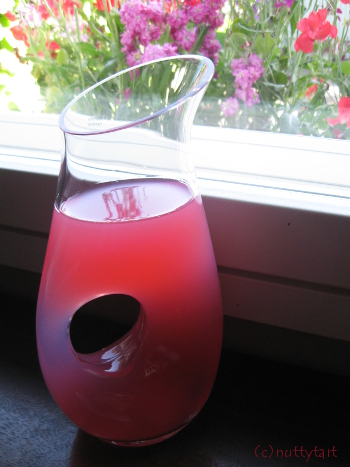
rhubarb juiceIn light of the fact that I have a few recipes to post that call for unsweetened rhubarb juice, I figured I’d better post a recipe for rhubarb juice first! Very simple indeedy: you need rhubarb and water. And sugar, should you wish to make juice for drinking rather than to use in one of my recipes. (You can surely drink the unsweetened juice too! I just personally wouldn’t. ;-) )


Rhubarb Juice (makes about 1 litre)


1 kg rhubarb

750 ml water

200 ml sugar (or to taste)

(2 tablespoons lemon juice – optional)


Rinse and chop rhubarb stalks.

Place rhubarb and water in a saucepan and bring gently to boil. Simmer, partly covered, for 20-30 minutes, or until rhubarb has lost its colour and is beginning to break apart.

Set a colander over a bowl and line it with a cheesecloth (coffee filters work too). Pour the mixture into the colander and allow to drain for about half an hour. (You can use the drained rhubarb mush to make a pie, if you wish!)

You now have unsweetend rhubarb juice to use to make rhubarb curd or jelly sweets, for example. Or, continue to make sweetened rhubarb juice:

Pour the juice into a saucepan and add sugar (and lemon juice, if using). Bring gently to boil. Simmer, skimming off foam, until the juice is clear. Pour into clean, hot bottles and seal.

Store rhubarb juice in a cool place. Dilute or mix the juice to your liking.


Share on FacebookShare on TwitterShare via email

Milk Chocolate Cake

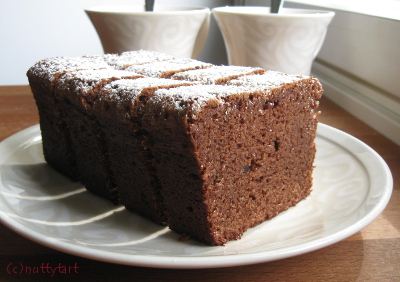
Milk chocolate cakeThe theme of Choclette‘s this month’s We Should Cocoa challenge is… chocolate! :-) Perfect!


I decided to test an idea I’ve been entertaining: boozing up a milk chocolate cake. I love milk chocolate, but because of its mild and sweet taste, milk chocolate cakes can sometimes be a little… lame, to me. So: add milk chocolate liqueur. And a touch of cocoa powder. Voilà. A soft, rich milk chocolate cake. More chocolatey, but still milk chocolatey!


Now, if you quite like milder milk chocolate cakes, feel free to leave out the cocoa powder (and use 300 ml of all-purpose flour). If you’d rather not add alcohol, leave out the liqueur and the yogurt, and add 100 ml of buttermilk instead. It will still be delicious!


Milk Chocolate Cake


175 g quality milk chocolate

90 g butter, at room temperature

200 ml sugar

2 eggs

1 teaspoon vanilla

275 ml all-purpose flour

2 tablespoons cocoa powder

1/2 teaspoon baking powder

1/4 teaspoon baking soda

pinch salt

75 ml chocolate liqueur (I used Mozart Chocolate Cream)

2 tablespoons plain yogurt


Preheat oven to 160 C. Grease a 23 cm x 13 cm (9″ x 5″) loaf pan and dust with cocoa powder.

Melt milk chocolate on top of a double boiler. Allow to cool.

In a bowl, sift together all-purpose flour, cocoa powder, baking powder, baking soda, and salt. Set aside.

In a mixing bowl, cream butter and sugar until light and fluffy. Add eggs one at a time, mixing well after each addition. Add vanilla and the melted chocolate, mix.

Alternately add the flour mixture, chocolate liqueur, and plain yogurt, beginning and ending with the flour. Avoid overmixing.

Pour batter into the prepared pan. Bake for 50-55 minutes, or until the cake tests just done.


Share on FacebookShare on TwitterShare via email

Red Currant Meringue Torte

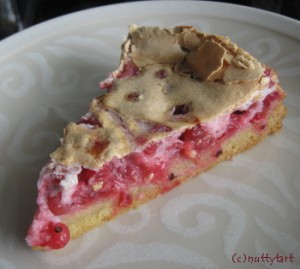
Red currant meringue torteWhether you want to use this year’s shiny new crop or just found a lonesome bag of last year’s red currants in the freezer, do give this gorgeous torte a try. The sturdy, lightly lemon-scented crust and the sweet, light meringue are the perfect, perfect companions for red currants! While I’m sure the recipe would work with other berries, too, I think with red currants it really shines.


The recipe is an adaption of a recipe posted by Lise in Indiana on Food.com – Lise, I thank you!


Red Currant Meringue Torte


Crust:

350 ml all-purpose flour

1 teaspoon baking powder

115 g butter, softened

115 ml white sugar

2 egg yolks

1 1⁄2 teaspoons lemon zest, grated


Filling:

2 egg whites

115 ml white sugar

2 teaspoons cornstarch

500 ml red currants (fresh  or frozen – if using frozen, drain very well)


Red currant meringue torte piece

To make crust:

Line the bottom of a 23-25cm/9-10” springform pan with parchment paper and lightly butter the sides.

In a medium bowl, sift together flour and baking powder. Add butter, sugar, egg yolks, and lemon zest and mix until the mixture comes together and forms dough.

Pat evenly into the bottom of the pan and transfer to the fridge.  Chill for 25-30 minutes.

Preheat oven to 165 C.

Bake the crust for 20-25 minutes, or until golden.

To make filling (while the crust is in the oven): In a medium bowl, beat egg whites until stiff.

Gradually add in sugar and cornstarch; beat for 5 minutes.

Fold currants into the meringue mixture. Pour into warm crust.

Continue baking for 25-30 minutes, or until the top is lightly browned.

Cool completely before serving.


Share on FacebookShare on TwitterShare via email

Lemony Lemon Muffins

Lemony Lemon Muffins

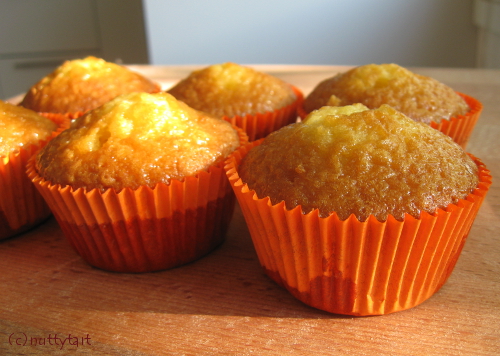
I know, I know… They don’t look like much! But believe me when I tell you that these muffins really are very moist and very lemony – they are thoroughly soaked in lemon syrup. If you want to add a super-lemony frosting, it can, of course, only make these even better by increasing the lemoniness factor. If you want to add a little lemon extract to the batter, great! If you want to add a splash of Limoncello to the lemon syrup, I like the way you think. But even as-is, these really are moistly lemony. One lemon, six muffins, easy-peasy.


Lemony Lemon Muffins (makes 6)


Muffins:

50 g butter
115 ml sugar
1 lemon, zest of
1 egg
50 ml light cream (or milk)
175 ml all-purpose flour
1/2 teaspoon baking soda
pinch of salt


Lemon syrup:
1 lemon, juice of
2 tablespoons sugar


Preheat oven to 175C and line six holes of a muffin pan with paper liners.

Melt the butter and allow to cool for a while. Whisk in sugar until well combined. Add lemon zest and egg; whisk; add light cream and stir to combine.

Combine flour, baking soda, and salt. Add to wet ingredients and mix just until combined.

Divide the batter between the six muffin cups. Bake for 18-22 minutes or until the muffins test done.

While the muffins are baking, combine lemon juice and sugar in a small saucepan. Bring gently to boil and simmer for a few minutes, or until the sugar is completely dissolved.

Allow the muffins to cool for about five minutes. Poke holes into the muffins – something larger than a toothpick but smaller than your typical spoon handle (with which you could probably poke twice – I used the handle of a honey dipper). Slowly pour the lemon syrup over muffin tops.

Allow to cool completely. Eat.


Share on FacebookShare on TwitterShare via email